Obsidian 插件:Templater
Templater 是一种模板语言,允许你将变量和函数结果插入到你的笔记中。它还可以让你执行 JavaScript 代码来操作这些变量和函数。
参照 Templater 文档,你将能够创建强大的模板来自动化手动任务。
快速示例
使用 Templater 语法的以下模板文件:
---
creation date: <% tp.file.creation_date() %>
modification date: <% tp.file.last_modified_date("dddd Do MMMM YYYY HH:mm:ss") %>
---
<<  [[<% tp.date.now("YYYY-MM-DD", 1) %> >>

# <% tp.file.title %>
 <% tp.web.daily_quote() %>
插入后将生成以下结果:
---
creation date: 2021-01-07 17:20
modification date: Thursday 7th January 2021 17:20:43
---
<< [[2021-04-10 >>
# Test Test
> Do the best you can until you know better. Then when you know better, do better.
> — <cite>Maya Angelou</cite>
术语
要了解 Templater 的工作原理,让我们定义几个术语:
- 模板是一个包含命令的文件。
- 一个以开启标签 <% 开头,以关闭标签 %>结尾的文本片段,我们将称之为命令。
- 一个函数是一个我们可以在命令中调用并返回值(替换字符串)的对象
有两种类型的函数可以使用:
-
内部函数。它们是插件内置的预定义函数。例如, tp.date.now 是一个内部函数,它将返回当前日期。
-
用户函数。用户可以定义自己的函数。它们是系统命令或用户脚本。
示例
以下模板包含 2 个命令,调用 2 个不同的内部函数:
Yesterday: <% tp.date.yesterday("YYYY-MM-DD") %>
Tomorrow: <% tp.date.tomorrow("YYYY-MM-DD") %>
在下一部分,我们将看到编写某些命令所需的语法。
语法
Templater 使用自定义模板引擎(rusty_engine)的语法来声明命令。你可能需要一点时间来适应它,但一旦你理解了它的概念,语法并不难。
Templater 的所有功能都是 JavaScript 对象,它们通过命令来调用。
命令语法
一个命令必须同时具有一个开始标签 <% 和一个结束标签 %> 。
使用 tp.date.now 内部函数的完整命令将是: <% tp.date.now() %>
函数语法
对象层次结构
Templater 的所有函数,无论是内部函数还是用户函数,都可在 tp 对象下使用。可以说我们所有的函数都是 tp 对象的子对象。要访问对象的“子对象”,我们必须使用点表示法 .
这意味着一个 Templater 函数调用将始终以 tp.<something> 开始
函数调用
要调用一个函数,需要用于特定函数调用的语法:在函数名后添加一个开括号和一个闭括号。
例如,我们会使用 tp.date.now() 来调用 tp.date.now 内部函数。
函数可以有参数和可选参数。它们位于括号之间,如:tp.date.now(arg1_value, arg2_value, arg3_value, ...)
所有参数必须按正确顺序传递。
函数的参数可以有不同的类型。以下是一些可能的函数类型,但不详尽:
- 一个
string类型意味着值必须放置在单引号或双引号("value"或'value')中 - 一个
number类型表示值必须是整数(15,-5, ...) - 一个
boolean类型表示值必须是true或false(全部小写),不能是其他任何值。
调用函数时必须尊重参数的类型,否则它将无法工作。
函数文档语法
Templater 内部函数的文档使用以下语法:
tp.<my_function>(arg1_name: type, arg2_name?: type, arg3_name: type = <default_value>, arg4_name: type1|type2, ...)
位置:
arg_name代表参数的符号名称,用于理解其含义。type代表参数的预期类型。在调用内部函数时,必须遵守此类型,否则将抛出错误。
如果参数是可选的,它将以问号 ? 结尾,例如 arg2_name?: type
如果一个参数有默认值,将使用等号 = 来指定,例如 arg3_name: type = <default_value> 。
如果一个参数可以有不同的类型,将使用管道 | 来指定,例如 arg4_name: type1|type2
请注意,这种语法仅用于文档目的,以便理解函数期望的参数。
你不应该在调用函数时指定参数的名称、类型或默认值,只需要提供参数的值。
以 tp.date.now 内部函数文档为例:
tp.date.now(format?: string = "YYYY-MM-DD", offset?: number|string, reference?: string, reference_format?: string)
这个内部函数有 4 个可选参数:
- 类型为
string的格式,默认值为"YYYY-MM-DD"。 - 类型为
number或类型为string的偏移量。 - 类型为
string的引用。 - 类型为
string的引用格式。
这意味着对此内部函数的有效调用是:
<% tp.date.now() %><% tp.date.now("YYYY-MM-DD", 7) %><% tp.date.now("YYYY-MM-DD", 7, "2021-04-09", "YYYY-MM-DD") %><% tp.date.now("dddd, MMMM Do YYYY", 0, tp.file.title, "YYYY-MM-DD") %><% tp.date.now("dddd, MMMM Do YYYY", 0, tp.file.title, "YYYY-MM-DD") %>
另一方面,无效的调用是:
tp.date.now(format: string = "YYYY-MM-DD")tp.date.now(format: string = "YYYY-MM-DD", offset?: 0)
设置
通用设置
Template folder location:此文件夹中的文件将可用作模板。Syntax Highlighting on Desktop在编辑模式下为 Templater 命令添加语法高亮。Syntax Highlighting on Mobile在移动端编辑模式下为 Templater 命令添加语法高亮。谨慎使用:这可能会在移动平台上破坏实时预览。”Automatic jump to cursor在插入模板后自动触发tp.file.cursor。您还可以设置热键来手动触发tp.file.cursor。Trigger Templater on new file creation: Templater 将监听新文件创建事件,如果符合您设置的规则,将替换新文件内容中的所有命令。这使得 Templater 与其他插件(如每日笔记核心插件、日历插件、回顾插件、笔记重构插件等)兼容。- 请确保在下方“文件夹模板”或“文件正则模板”中设置规则。
- 警告:如果您在创建时添加了未知/不安全内容的新文件,这可能会带来危险。确保每个新文件在创建时的内容都是安全的。”
模板快捷键
模板快捷键允许您将模板绑定到快捷键。
文件夹模板
此设置默认隐藏。要查看它,请首先启用 Trigger Template on new file creation 设置。并且由于它与文件正则模板互斥,启用其中一个将禁用另一个。
您可以使用 Folder Templates 功能指定一个模板,该模板将自动应用于选定文件夹及其子文件夹。将使用最深的匹配项,因此规则的顺序无关紧要。
如果您需要通配符,请为 " / " 添加一条规则。
文件正则模板
此设置默认隐藏。要查看它,首先需要启用 Trigger Template on new file creation 设置。由于它与文件夹模板互斥,启用其中一个将禁用另一个。
您可以指定正则表达式声明,用于测试新文件路径。如果正则表达式匹配,则将自动使用关联的模板。规则将按从上到下的顺序进行测试,第一个匹配项将被使用。
如果您需要通配符,请以规则 " .* " 结尾。
使用 Regex101 等工具来验证您的正则表达式。
启动模板
启动模板是在 Templater 启动时执行一次的模板。这些模板不会输出任何内容。这可以用于设置模板,例如向 Obsidian 事件添加钩子。
用户脚本函数
本文件夹中的所有 JavaScript 文件将作为 CommonJS 模块加载,以导入自定义用户函数。
该文件夹需要可以从保险库访问。
请查阅文档获取更多信息。
用户系统命令函数
允许您创建与系统命令关联的用户函数。
查阅文档获取更多信息。
从不可信来源执行任意系统命令可能很危险。仅从可信来源运行您理解的系统命令。
常见问题
在 Windows 上 Unicode 字符(表情符号、...)无法工作吗?
在 Windows 上 cmd.exe 和 powershell 已知与 Unicode 字符存在问题。
您可以查看 https://github.com/SilentVoid13/Templater/issues/15#issuecomment-824067020 获取解决方案。
另一个不错的解决方案(可能是最好的)是使用 Windows Terminal 并将其设置为 Templater 设置中的默认 shell。
另一个可能对你有用的解决方案资源:https://stackoverflow.com/questions/49476326/displaying-unicode-in-powershell
内部函数
Templater 提供的不同内部变量和函数分布在不同的模块下,以便分类。现有的内部模块有:
- App module:
tp.app - Config module:
tp.config - Date module:
tp.date - File module:
tp.file - Frontmatter module:
tp.frontmatter - Hooks module:
tp.hooks - Obsidian module:
tp.obsidian - System module:
tp.system - Web module:
tp.web
如果你正确理解了对象层次结构,这意味着一个典型的内部函数调用看起来是这样的: <% tp.<module_name>.<internal_function_name> %>
贡献
我邀请大家通过添加新的内部函数来为这个插件开发做出贡献。更多信息请查看这里。
App 模块:tp.app
该模块暴露了应用实例。建议优先使用该模块而不是全局应用实例。
在编写脚本时,这主要是有用的。
有关更多信息,请参阅 Obsidian 开发者文档。
// Get all folders
 <%
 tp.app.vault.getAllLoadedFiles()
 .filter(x => x instanceof tp.obsidian.TFolder)
 .map(x => x.name)
 %>

// Update frontmatter of existing file
 <%*
 const file = tp.file.find_tfile("path/to/file");
 await tp.app.fileManager.processFrontMatter(file, (frontmatter) => {
 frontmatter["key"] = "value"; });
 %>
配置模块:tp.config
该模块暴露了 Templater 的运行配置。这主要在编写需要一些上下文信息的脚本时有用。
tp.config.active_file?
The active file (if existing) when launching Templater.
启动 Templater 时,活动文件(如果存在)。
tp.config.run_mode
RunMode ,代表 Templater 的启动方式(从模板创建新文件、附加到活动文件等)。
tp.config.target_file
TFile代表模板将被插入的目标文件的对象 。
tp.config.template_file
TFile 代表模板文件的对象 。
日期模块:tp.date
该模块包含所有与日期相关的内部函数。
函数文档使用特定的语法。更多信息在这里。
获取日期:tp.date.now(format: string = "YYYY-MM-DD", offset?: number|string, reference?: string, reference_format?: string)
format : 日期的格式。默认为 "YYYY-MM-DD" 。参考格式说明。
offset : 从日期偏移的时间长度。如果提供数字,时间长度将以天为单位加到日期上。你也可以使用 ISO 8601 格式的字符串来指定偏移量。
reference : 日期参考,例如设置为笔记的标题。
reference_format : 参考日期的格式。
// Date now
<% tp.date.now() %>
// Date now with format <% tp.date.now("Do MMMM YYYY") %>
// Last week <% tp.date.now("YYYY-MM-DD", -7) %>
// Next week <% tp.date.now("YYYY-MM-DD", 7) %>
// Last month <% tp.date.now("YYYY-MM-DD", "P-1M") %>
// Next year <% tp.date.now("YYYY-MM-DD", "P1Y") %>
// File's title date + 1 day (tomorrow) <% tp.date.now("YYYY-MM-DD", 1, tp.file.title, "YYYY-MM-DD") %>
// File's title date - 1 day (yesterday) <% tp.date.now("YYYY-MM-DD", -1, tp.file.title, "YYYY-MM-DD") %>
获取明天的日期:tp.date.tomorrow(format: string = "YYYY-MM-DD")
format : 日期的格式。默认为 "YYYY-MM-DD" 。
// Date tomorrow
<% tp.date.tomorrow() %>
// Date tomorrow with format
<% tp.date.tomorrow("Do MMMM YYYY") %>
tp.date.weekday(format: string = "YYYY-MM-DD", weekday: number, reference?: string, reference_format?: string)
format : 日期的格式。默认为 "YYYY-MM-DD" 。
weekday : 星期几的数字。如果区域设置将星期一视为一周的第一天, 0 将是星期一, -7 将是上周的星期几。
reference : 日期参照,例如将其设置为笔记的标题。
reference_format : 参照日期的格式。
// This week's Monday <% tp.date.weekday("YYYY-MM-DD", 0) %> // Next Monday <% tp.date.weekday("YYYY-MM-DD", 7) %> // File's title Monday <% tp.date.weekday("YYYY-MM-DD", 0, tp.file.title, "YYYY-MM-DD") %> // File's title previous Monday <% tp.date.weekday("YYYY-MM-DD", -7, tp.file.title, "YYYY-MM-DD") %>
tp.date.yesterday(format: string = "YYYY-MM-DD")
获取昨天的日期。
示例
// Date yesterday <% tp.date.yesterday() %> // Date yesterday with format <% tp.date.yesterday("Do MMMM YYYY") %>
Moment.js
Templater 提供了对 moment 对象的访问,以及其所有功能。
有关 moment.js 的更多信息,请查看此处。
// Date now <% moment(tp.file.title, "YYYY-MM-DD").format("YYYY-MM-DD") %>
// Get start of month from note title <% moment(tp.file.title, "YYYY-MM-DD").startOf("month").format("YYYY-MM-DD") %>
// Get end of month from note title <% moment(tp.file.title, "YYYY-MM-DD").endOf("month").format("YYYY-MM-DD") %>
// Date now <% tp.date.now() %>
// Date now with format <% tp.date.now("Do MMMM YYYY") %>
// Last week <% tp.date.now("YYYY-MM-DD", -7) %>
// Next week <% tp.date.now("YYYY-MM-DD", 7) %>
// Last month <% tp.date.now("YYYY-MM-DD", "P-1M") %>
// Next year <% tp.date.now("YYYY-MM-DD", "P1Y") %>
// File's title date + 1 day (tomorrow) <% tp.date.now("YYYY-MM-DD", 1, tp.file.title, "YYYY-MM-DD") %>
// File's title date - 1 day (yesterday) <% tp.date.now("YYYY-MM-DD", -1, tp.file.title, "YYYY-MM-DD") %>
// Date tomorrow <% tp.date.tomorrow() %>
// Date tomorrow with format <% tp.date.tomorrow("Do MMMM YYYY") %>
// This week's Monday <% tp.date.weekday("YYYY-MM-DD", 0) %>
// Next Monday <% tp.date.weekday("YYYY-MM-DD", 7) %>
// File's title Monday <% tp.date.weekday("YYYY-MM-DD", 0, tp.file.title, "YYYY-MM-DD") %>
// File's title previous Monday <% tp.date.weekday("YYYY-MM-DD", -7, tp.file.title, "YYYY-MM-DD") %>
// Date yesterday <% tp.date.yesterday() %>
// Date yesterday with format <% tp.date.yesterday("Do MMMM YYYY") %>
文件模块:tp.file
该模块包含所有与文件相关的内部函数。
函数文档使用特定的语法。更多信息请参考这里。
tp.file.content
Templater 执行时该文件的内容字符串。修改这个字符串不会更新当前文件。
// Retrieve file content <% tp.file.content %>
tp.file.create_new(template: TFile | string, filename?: string, open_new: boolean = false, folder?: TFolder | string)
使用指定的模板或指定内容创建新文件。
template : 新文件内容的模板,或作为字符串的文件内容。如果是要使用的模板,你可以用 tp.file.find_tfile(TEMPLATENAME) 获取它。
filename : 新文件的文件名,默认为"Untitled"。
open_new : 是否打开新创建的文件。警告:如果你使用这个选项,由于命令是异步执行的,文件可能会先被打开,然后其他命令会被追加到这个新文件中,而不是之前的文件。
folder : 新文件存放的文件夹,默认为 Obsidian 的默认位置。如果你希望文件出现在不同的文件夹中,可以使用 "PATH/TO/FOLDERNAME" 或 tp.app.vault.getAbstractFileByPath("PATH/TO/FOLDERNAME") 指定。
// File creation
 <%* await tp.file.create_new("MyFileContent", "MyFilename") %>

// File creation with template
 <%* await tp.file.create_new(tp.file.find_tfile("MyTemplate"), "MyFilename") %>

// File creation and open created note
 <%* await tp.file.create_new("MyFileContent", "MyFilename", true) %>

// File creation in current folder
 <%* await tp.file.create_new("MyFileContent", "MyFilename", false, tp.file.folder(true)) %>

// File creation in specified folder with string path
 <%* await tp.file.create_new("MyFileContent", "MyFilename", false, "Path/To/MyFolder") %>

// File creation in specified folder with TFolder
 <%* await tp.file.create_new("MyFileContent", "MyFilename", false, tp.app.vault.getAbstractFileByPath("MyFolder")) %>

// File creation and append link to current note
 [[<% (await tp.file.create_new("MyFileContent", "MyFilename")).basename %>]]
tp.file.creation_date(format: string = "YYYY-MM-DD HH:mm")
获取文件的创建日期。
format : 日期的格式。默认为 "YYYY-MM-DD HH:mm"。
// File creation date
 <% tp.file.creation_date() %>
// File creation date with format
 <% tp.file.creation_date("dddd Do MMMM YYYY HH:mm") %>
tp.file.cursor(order?: number)
在模板插入后,将光标设置到此位置。
您可以使用 Obsidian 设置中的配置热键在不同光标之间导航。
order : 不同光标跳转的顺序,例如它会从 1 跳转到 2,再跳转到 3,以此类推。如果您指定多个 tp.file.cursor 并使用相同的顺序,编辑器将切换到多光标模式。
// File cursor <% tp.file.cursor() %>
// File multi-cursor <% tp.file.cursor(1) %>Content<% tp.file.cursor(1) %>
tp.file.cursor_append(content: string)
在文件中当前光标之后追加一些内容。
content : 在活动光标后追加的内容。
// File cursor append <% tp.file.cursor_append("Some text") %>
tp.file.exists(filepath: string)
通过文件路径检查文件是否存在。必须提供相对于 Vault 的完整文件路径,包括扩展名。
filepath : 我们想要检查其存在性的文件的完整文件路径。
// File existence <% await tp.file.exists("MyFolder/MyFile.md") %>
// File existence of current file <% await tp.file.exists(tp.file.folder(true) + "/" + tp.file.title + ".md") %>`
搜索文件并返回其 TFile 实例。
filename : 我们想要搜索并解析为 TFile 的文件名。
// File find TFile <% tp.file.find_tfile("MyFile").basename %>
tp.file.folder(absolute: boolean = false)
获取文件的文件夹名称。
absolute : 如果设置为 true ,则返回文件夹的库绝对路径。如果为 false ,则只返回文件夹的基本名称(最后一部分)。默认为 false 。
示例
// File folder (Folder) <% tp.file.folder() %>
// File folder with vault-absolute path (Path/To/Folder) <% tp.file.folder(true) %>
tp.file.include(include_link: string | TFile)
包含文件的链接内容。包含内容中的模板将被解析。
include_link : 要包含的文件链接,例如 "[[MyFile]]" ,或 TFile 对象。也支持部分或块包含。
// File include <% await tp.file.include("[[Template1]]") %>
// File include TFile <% await tp.file.include(tp.file.find_tfile("MyFile")) %>
// File include section <% await tp.file.include("[[MyFile#Section1]]") %>
// File include block <% await tp.file.include("[[MyFile#^block1]]") %>
tp.file.last_modified_date(format: string = "YYYY-MM-DD HH:mm")
获取文件的最后修改日期。
format : 日期的格式。默认为 "YYYY-MM-DD HH:mm" 。参考格式说明。
示例
// File last modified date <% tp.file.last_modified_date() %> // File last modified date with format <% tp.file.last_modified_date("dddd Do MMMM YYYY HH:mm") %>
tp.file.move(new_path: string, file_to_move?: TFile)
将文件移动到目标保险库位置。
new_path : 文件的新相对路径,不包含文件扩展名。注意:新路径需要包含文件夹和文件名,例如 "/Notes/MyNote" 。
file_to_move : 要移动的文件,默认为当前文件。
示例
// File move <%* await tp.file.move("/A/B/" + tp.file.title) %> // File move and rename <%* await tp.file.move("/A/B/NewTitle") %>
tp.file.path(relative: boolean = false)
获取系统上文件的绝对路径。
relative : 如果设置为 true ,则只检索保险库的相对路径。
// File path <% tp.file.path() %> // File relative path (relative to vault root) <% tp.file.path(true) %>
tp.file.rename(new_title: string)
重命名文件(保留相同的文件扩展名)。
new_title : 新文件标题。
示例
// File rename <%* await tp.file.rename("MyNewName") %> // File append a 2 to the file name <%* await tp.file.rename(tp.file.title + "2") %>
tp.file.selection()
获取当前活动文件的文本选择。
示例
// File selection <% tp.file.selection() %>
tp.file.tags
获取文件的标签(字符串数组)。
// File tags <% tp.file.tags %>
tp.file.title
获取文件标题。
// File title <% tp.file.title %> // Strip the Zettelkasten ID of title (if space separated) <% tp.file.title.split(" ")[1] %>
// Retrieve file content <% tp.file.content %>
// File creation <%* await tp.file.create_new("MyFileContent", "MyFilename") %>
// File creation with template <%* await tp.file.create_new(tp.file.find_tfile("MyTemplate"), "MyFilename") %>
// File creation and open created note <%* await tp.file.create_new("MyFileContent", "MyFilename", true) %>
// File creation in current folder <%* await tp.file.create_new("MyFileContent", "MyFilename", false, tp.file.folder(true)) %>
// File creation in specified folder with string path <%* await tp.file.create_new("MyFileContent", "MyFilename", false, "Path/To/MyFolder") %>
// File creation in specified folder with TFolder <%* await tp.file.create_new("MyFileContent", "MyFilename", false, tp.app.vault.getAbstractFileByPath("MyFolder")) %>
// File creation and append link to current note [[<% (await tp.file.create_new("MyFileContent", "MyFilename")).basename %>]]
// File creation date <% tp.file.creation_date() %>
// File creation date with format <% tp.file.creation_date("dddd Do MMMM YYYY HH:mm") %>// File cursor <% tp.file.cursor() %>
// File multi-cursor <% tp.file.cursor(1) %>Content<% tp.file.cursor(1) %>
// File cursor append <% tp.file.cursor_append("Some text") %>
// File existence <% await tp.file.exists("MyFolder/MyFile.md") %>
// File existence of current file <% await tp.file.exists(tp.file.folder(true) + "/" + tp.file.title + ".md") %>
// File find TFile <% tp.file.find_tfile("MyFile").basename %>
// File folder (Folder) <% tp.file.folder() %>
// File folder with vault-absolute path (Path/To/Folder) <% tp.file.folder(true) %>
// File include <% await tp.file.include("[[Template1]]") %>
// File include TFile <% await tp.file.include(tp.file.find_tfile("MyFile")) %>
// File include section <% await tp.file.include("[[MyFile#Section1]]") %>
// File include block <% await tp.file.include("[[MyFile#^block1]]") %>
// File last modified date <% tp.file.last_modified_date() %>
// File last modified date with format <% tp.file.last_modified_date("dddd Do MMMM YYYY HH:mm") %>// File move <%* await tp.file.move("/A/B/" + tp.file.title) %>
// File move and rename <%* await tp.file.move("/A/B/NewTitle") %>
// File path <% tp.file.path() %>
// File relative path (relative to vault root) <% tp.file.path(true) %>
// File rename <%* await tp.file.rename("MyNewName") %>
// File append a 2 to the file name <%* await tp.file.rename(tp.file.title + "2") %>
// File selection <% tp.file.selection() %>
// File tags <% tp.file.tags %>
// File title <% tp.file.title %>
// Strip the Zettelkasten ID of title (if space separated) <% tp.file.title.split(" ")[1] %>
Frontmatter 模块:tp.frontmatter
该模块将文件的所有 frontmatter 变量暴露为变量。
tp.frontmatter.<frontmatter_variable_name>
获取文件的 frontmatter 变量值。
如果你的 frontmatter 变量名包含空格,你可以使用方括号表示法来引用它,例如:<% tp.frontmatter["variable name with spaces"] %>
假设你有一个如下文件:--- alias: myfile note type: seedling ---file content
那么你可以使用如下模板:
File's metadata alias: <% tp.frontmatter.alias %> Note's type: <% tp.frontmatter["note type"] %>
对于 frontmatter 中的列表,你可以使用 JavaScript 数组原型方法来操作数据的显示方式。
--- categories: - book - movie ---
<% tp.frontmatter.categories.map(prop => `- "${prop}"`).join("\n") %>
钩子模块:tp.hooks
该模块提供了钩子,允许您在 Templater 事件发生时执行代码。
tp.hooks.on_all_templates_executed(callback_function: () => any)
钩子用于在所有正在运行的模板都执行完毕时触发。通常情况下这将是一个模板,除非您正在使用 tp.file.include 或 tp.file.create_new 。
这个方法多次调用时,它们的回调函数将并行运行。
callback_function : 当所有正在运行的模板都执行完毕时将执行的回调函数。
// Update frontmatter after template finishes executing <%* tp.hooks.on_all_templates_executed(async () => { const file = tp.file.find_tfile(tp.file.path(true)); await tp.app.fileManager.processFrontMatter(file, (frontmatter) => { frontmatter["key"] = "value"; }); }); %>
// Run a command from another plugin that modifies the current file, after Templater has updated the file <%* tp.hooks.on_all_templates_executed(() => { tp.app.commands.executeCommandById("obsidian-linter:lint-file"); }); -%>
Obsidian 模块:tp.obsidian
该模块公开了 Obsidian API 的所有函数和类。
这主要在编写脚本时有用。有关更多信息,请参阅 Obsidian API 声明文件。
示例
// Get all folders <% tp.app.vault.getAllLoadedFiles() .filter(x => x instanceof tp.obsidian.TFolder) .map(x => x.name) %>
// Normalize path <% tp.obsidian.normalizePath("Path/to/file.md") %>
// Html to markdown <% tp.obsidian.htmlToMarkdown("\<h1>Heading\</h1>\<p>Paragraph\</p>") %>
// HTTP request <%* const response = await tp.obsidian.requestUrl("https://jsonplaceholder.typicode.com/todos/1"); tR += response.json.title; %>
系统模块:tp.system
该模块包含与系统相关的函数。
tp.system.clipboard()
获取剪贴板内容。
示例
// Clipboard <% tp.system.clipboard() %>
tp.system.prompt(prompt_text?: string, default_value?: string, throw_on_cancel: boolean = false, multiline?: boolean = false)
生成一个提示模态框并返回用户的输入。
prompt_text : 放置在输入框上方的文本。
default_value : 输入框的默认值。
throw_on_cancel : 如果提示被取消,则抛出错误,而不是返回 null 值。
multiline : 如果设置为 true ,输入字段将是一个多行文本区域。默认为 false 。
示例
// Prompt <% await tp.system.prompt("Please enter a value") %> // Prompt with default value <% await tp.system.prompt("What is your mood today?", "happy") %> // Multiline prompt <% await tp.system.prompt("What is your mood today?", null, false, true) %> // Reuse output from prompt <%* let value = await tp.system.prompt("Please enter a value"); %> # <% value %> selected value: <% value %>
tp.system.suggester(text_items: string[] | ((item: T) => string), items: T[], throw_on_cancel: boolean = false, placeholder: string = "", limit?: number = undefined)
生成一个建议提示,并返回用户选择的项目。
text_items : 字符串数组,表示在建议提示中为每个项目显示的文本。这也可以是一个将项目映射到其文本表示的函数。
items : 包含每个项目值的数组,顺序正确。
throw_on_cancel : 如果提示被取消,则抛出错误,而不是返回 null 值。
placeholder : 提示的占位符字符串。
limit : 限制一次渲染的项目数量(在显示大型列表时有助于提高性能)。
示例
// Suggester <% await tp.system.suggester(["Happy", "Sad", "Confused"], ["Happy", "Sad", "Confused"]) %> // Suggester with mapping function (same as above example) <% await tp.system.suggester((item) => item, ["Happy", "Sad", "Confused"]) %> // Suggester for files [[<% (await tp.system.suggester((item) => item.basename, tp.app.vault.getMarkdownFiles())).basename %>]] // Suggester for tags <% await tp.system.suggester(item => item, Object.keys(tp.app.metadataCache.getTags()).map(x => x.replace("#", ""))) %> // Reuse value from suggester <%* let selectedValue = await tp.system.suggester(["Happy", "Sad", "Confused"], ["Happy", "Sad", "Confused"]); %> # <% selectedValue %> selected value: <% selectedValue %>
示例
// Clipboard <% tp.system.clipboard() %>// Prompt <% await tp.system.prompt("Please enter a value") %> // Prompt with default value <% await tp.system.prompt("What is your mood today?", "happy") %> // Multiline prompt <% await tp.system.prompt("What is your mood today?", null, false, true) %> // Reuse output from prompt <%* let value = await tp.system.prompt("Please enter a value"); %> # <% value %> selected value: <% value %>// Suggester <% await tp.system.suggester(["Happy", "Sad", "Confused"], ["Happy", "Sad", "Confused"]) %> // Suggester with mapping function (same as above example) <% await tp.system.suggester((item) => item, ["Happy", "Sad", "Confused"]) %> // Suggester for files [[<% (await tp.system.suggester((item) => item.basename, tp.app.vault.getMarkdownFiles())).basename %>]] // Suggester for tags <% await tp.system.suggester(item => item, Object.keys(tp.app.metadataCache.getTags()).map(x => x.replace("#", ""))) %> // Reuse value from suggester <%* let selectedValue = await tp.system.suggester(["Happy", "Sad", "Confused"], ["Happy", "Sad", "Confused"]); %> # <% selectedValue %> selected value: <% selectedValue %>
Web 模块:tp.web
该模块包含所有与网络相关的内部功能(如发起网络请求)。
tp.web.daily_quote()
从 https://github.com/Zachatoo/quotes-database 获取并解析每日名言,以引用形式显示。
示例
// Daily quote <% await tp.web.daily_quote() %>
tp.web.random_picture(size?: string, query?: string, include_size?: boolean)
从 https://unsplash.com/ 获取随机图片。
size : 图片尺寸格式为 <width>x<height> 。
query : 限制选择与搜索词匹配的照片。多个搜索词可以由逗号分隔传递。
include_size : 可选参数,用于在图像链接的 markdown 中包含指定的尺寸。默认为 false。
示例
// Random picture <% await tp.web.random_picture() %> // Random picture with size <% await tp.web.random_picture("200x200") %> // Random picture with size and query <% await tp.web.random_picture("200x200", "landscape,water") %>
tp.web.request(url: string, path?: string)
向指定的 URL 发起 HTTP 请求。可选地,您可以指定路径以从响应中提取特定数据。
url : 将进行 HTTP 请求的 URL。
path : 响应 JSON 中的路径,用于提取特定数据。
示例
// Simple request <% await tp.web.request("https://jsonplaceholder.typicode.com/todos/1") %> // Request with path <% await tp.web.request("https://jsonplaceholder.typicode.com/todos", "0.title") %>
// Daily quote <% await tp.web.daily_quote() %>// Random picture <% await tp.web.random_picture() %> // Random picture with size <% await tp.web.random_picture("200x200") %> // Random picture with size and query <% await tp.web.random_picture("200x200", "landscape,water") %>// Simple request <% await tp.web.request("https://jsonplaceholder.typicode.com/todos/1") %> // Request with path <% await tp.web.request("https://jsonplaceholder.typicode.com/todos", "0.title") %>
贡献
你可以通过开发一个新的内部函数/变量来为 Templater 做出贡献。
开发新功能的过程非常简单。
请记住,只有相关的提交才会被接受,不要提交一个非常特定的内部变量/函数,只有你会使用它。
布局Layout
Internal variables / functions are sorted by modules. Each module has a dedicated folder under src/InternalTemplates.
内部变量/函数按模块分类。每个模块在 src/InternalTemplates 下都有一个专门的文件夹。
以日期模块为例。
It contains an InternalModuleDate file where all our internal date's related variables and functions are defined and registered:
它包含一个 InternalModuleDate 文件,其中定义并注册了我们所有与内部日期相关的变量和函数:
export class InternalModuleDate extends InternalModule { name = "date";async createStaticTemplates() { this.static_templates.set("now", this.generate_now()); this.static_templates.set("tomorrow", this.generate_tomorrow()); this.static_templates.set("yesterday", this.generate_yesterday()); }async updateTemplates() {}generate_now() { return (format: string = "YYYY-MM-DD", offset?: number, reference?: string, reference_format?: string) => { if (reference && !window.moment(reference, reference_format).isValid()) { throw new Error("Invalid title date format, try specifying one with the argument 'reference'"); } return get_date_string(format, offset, reference, reference_format); } }generate_tomorrow() { return (format: string = "YYYY-MM-DD") => { return get_date_string(format, 1); } }generate_yesterday() { return (format: string = "YYYY-MM-DD") => { return get_date_string(format, -1); } } }
Every module extends the InternalModule abstract class, which means they contain the following attributes and methods:
每个模块都扩展了 InternalModule 抽象类,这意味着它们包含以下属性和方法:
this.app 属性:Obsidian API App 对象。
this.file 属性:模板将被插入的目标文件。
this.plugin 属性:Templater 插件对象。
this.static_templates 属性:一个包含所有静态(名称;变量/函数)的映射。静态变量/函数意味着在执行时不依赖于文件。这种类型的变量/函数不会在每次插入新模板时更新,以节省一些开销。
this.dynamic_templates 属性:与 static_templates 相同,但它包含在执行时依赖于文件的变量/函数。
this.createStaticTemplates() 方法:为该模块注册所有静态内部变量/函数。
this.updateTemplates() 方法:为该模块注册所有动态内部变量/函数。
如果您需要,可以在新的内部变量/函数中使用这些属性。
注册新的内部变量/函数
以下是注册模块中新的内部变量/函数所需的步骤:
第一步:在模块中创建一个名为 generate_<internal_variable_or_function_name>() 的方法,该方法将生成你的内部变量/函数,这意味着它将返回一个 lambda 函数(代表内部函数)或直接返回你想暴露的内部变量。
所有生成方法都根据内部变量/函数的名称按字母顺序排列。
给你的变量/函数取一个良好、有解释性的名称。
第二步:根据你的内部变量/函数在文件执行时是否已存在,将其注册到 static_templates 或 dynamic_templates 映射中。注册过程发生在 createStaticTemplates 或 updateTemplates 。
要注册你的变量/函数,使用你之前定义的 this.generate_<internal_variable_or_function_name>() 方法:
this.static_templates.set(<internal_variable_or_function_name>, this.generate_<internal_variable_or_function_name>()); OR this.dynamic_templates.set(<internal_variable_or_function_name>, this.generate_<internal_variable_or_function_name>());
内部变量/函数的注册也是根据变量/函数名称的字母顺序排列的。
第三步:将你的内部变量/函数文档添加到 Templater 的文档中。
And you are done ! Thanks for contributing to Templater !
你完成了!感谢你为 Templater 做出贡献!
Now, just submit a pull request on Github, I'll try to be as reactive as possible.
现在,只需在 Github 上提交一个 pull request,我会尽量尽快响应。
用户函数
您可以在 Templater 中定义自己的函数。
您可以使用两种类型的用户函数:
调用用户函数
您可以使用常规函数调用语法调用用户函数: tp.user.<user_function_name>() ,其中 <user_function_name> 是您定义的函数名。
例如,如果您定义了一个名为 echo 的系统命令用户函数,一个完整的命令调用将如下所示:
<% tp.user.echo() %>
不支持移动设备
目前用户函数在移动端的 Obsidian 上不可用。
脚本用户函数
这种用户函数允许你从 JavaScript 文件中调用 JavaScript 函数并获取它们的输出。
要使用脚本用户函数,你需要在 Templater 的设置中指定一个脚本文件夹。这个文件夹需要可以从你的保险库访问。
定义一个脚本用户函数
假设你在 Templater 的设置中指定了 Scripts 文件夹作为你的脚本文件夹。
Templater 将加载 Scripts 文件夹中的所有 JavaScript( .js 文件)脚本。
然后你可以创建一个名为 Scripts/my_script.js 的脚本(必须使用 .js 扩展名),例如。你可能需要将文件创建在 Obsidian 外部,因为 Obsidian 只创建 markdown 文件。
然后你将能够将你的脚本作为用户函数调用。函数名称对应于脚本文件名。
脚本应遵循 CommonJS 模块规范,并导出一个单一函数。
function my_function (msg) { return `Message from my script: ${msg}`; } module.exports = my_function;
在这个例子中,一个完整的命令调用看起来是这样的:<% tp.user.my_script("Hello World!") %>,这将输出 Message from my script: Hello World! 。
全局命名空间
在脚本用户函数中,你仍然可以访问全局命名空间变量,如 app 或 moment 。
然而,你不能访问模板引擎作用域的变量,如 tp 或 tR 。如果你想要使用它们,你必须将它们作为参数传递给你的函数。
函数参数
你可以根据你如何定义它,传递任意数量的参数给你的函数。
你可以例如将 tp 对象传递给你的函数,以便使用 Templater 的所有内部变量/函数: <% tp.user.<user_function_name>(tp) %>
用户脚本文档
你可以选择使用 TSDoc 标准在方法文件顶部记录脚本的作用。如果提供,这将为你的用户脚本提供类似智能感知的体验,类似于其他 Templater 函数的体验。
带文档的用户脚本示例
/*** This does something cool*/ function doSomething() { console.log('Something was done') }module.exports = doSomething;
系统命令 用户函数
这种用户函数允许你执行系统命令并获取其输出。
系统命令用户函数需要在 Templater 的设置中启用。
定义系统命令用户函数
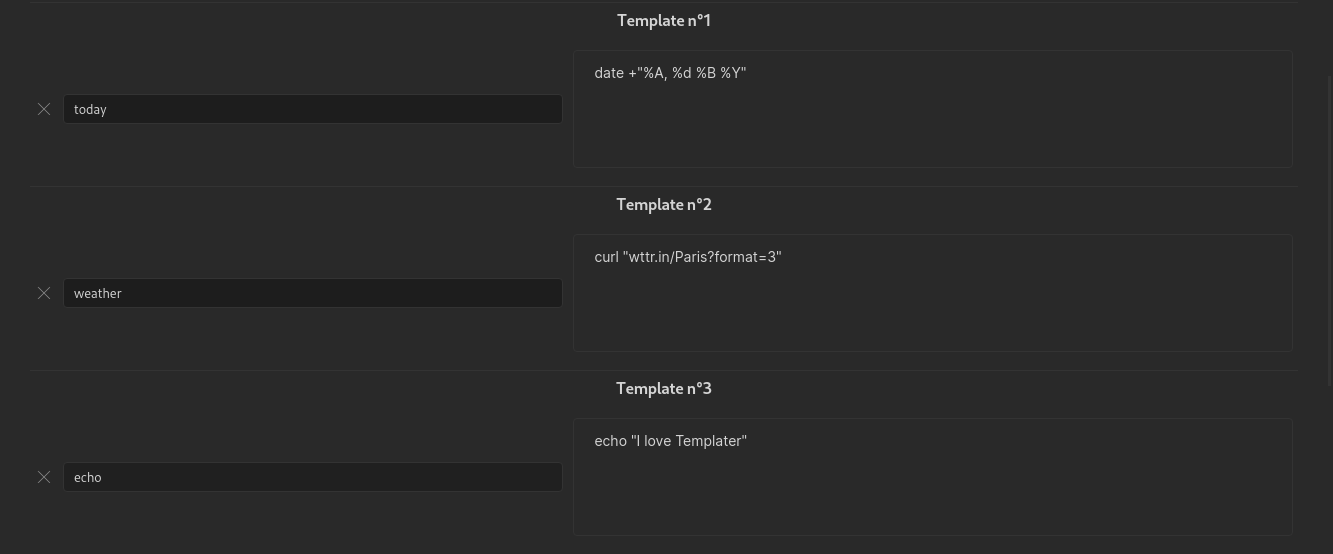
要定义一个新的系统命令用户函数,你需要定义一个函数名,并将其与一个系统命令关联。
要完成这个操作,请前往插件的设置并点击 Add User Function 。
完成这些步骤后,Templater 将创建一个以您定义的名称命名的用户函数,该函数将执行您的系统命令并返回其输出。
与内部函数一样,用户函数可以在 tp JavaScript 对象下找到,更具体地说是在 tp.user 对象下。
函数 参数
你可以向用户函数传递可选参数。这些参数必须作为一个包含属性及其对应值的 JavaScript 对象传递: {arg1: value1, arg2: value2, ...} 。
这些参数将以环境变量的形式提供给你的程序/脚本。
在我们的前一个示例中,这将给出以下命令声明:<% tp.user.echo({a: "value 1", b: "value 2"})%>
如果我们的系统命令调用的是一个 bash 脚本,我们将能够使用 $a 和 $b 访问变量 a 和 b 。
系统命令中的内部函数
您可以在系统命令中使用内部函数。在系统命令执行之前,内部函数将被替换。
例如,如果您配置了系统命令 cat <% tp.file.path() %> ,在系统命令执行之前,它将被替换为 cat /path/to/file 。
命令 Commands
命令类型
Templater 定义了 2 种类型的开启标签,定义了 2 种类型的命令:
-
<% : 插值命令。它将输出表达式内部的结果。
-
<%* : JavaScript 执行命令。它会执行命令内部包含的 JavaScript 代码。默认情况下不会输出任何内容。
命令的结束标签始终相同: %>
命令工具
除了不同类型的命令,您还可以使用命令工具。它们也在命令的起始标签中声明。所有命令工具适用于所有命令类型。可用的命令工具包括:
动态命令
使用这个命令工具,你可以将命令声明为"动态",这意味着该命令将在进入预览模式时被解析。
要声明一个动态命令,在命令开启标签后添加一个加号 + 符号: <%+
就这样,你的命令现在只在预览模式下执行。
这对于内部功能很有用,比如 tp.file.last_modified_date :
Last modified date: <%+ tp.file.last_modified_date() %>
刷新问题
预览模式的一个“缺点”是它会将渲染的笔记放入缓存,以加快速度。这意味着您的动态命令仅在您打开笔记时渲染一次,之后不会刷新。如果您想刷新它,您必须关闭笔记以清除缓存,然后再次打开。
JavaScript 执行命令
这种命令允许我们执行 JavaScript 代码。
通过 JavaScript 执行命令,我们可以做几乎所有 JavaScript 允许我们做的事情。以下是一些例子。
我们仍然可以从此类命令中访问 tp 对象以及所有内部变量/函数。
JavaScript 执行命令让你可以访问全局命名空间变量。这意味着你可以访问像 app 或 moment 这样的内容。
异步函数
一些内部函数是异步的。在 JavaScript 执行命令中调用这些函数时,如果需要,别忘了使用 await 关键字。
如何从 JavaScript 执行命令中输出一个值?
Sometimes, you may want to output something when using a JS execution command.
有时,在使用 JS 执行命令时,您可能希望输出某些内容。
当我们的模板引擎使用所有命令的结果生成替换字符串时,它会被存储在一个名为 tR 的变量中。这是包含处理后的文件内容的字符串。您可以从 JS 执行命令中访问该变量。
这意味着,要从 JS 执行命令中输出内容,您只需要将希望输出的内容追加到 tR 字符串变量中。
例如,以下命令: <%* tR += "test" %> 将输出 test 。
你也可以覆盖 tR 来忽略模板引擎到此为止生成的所有内容。如果你想在模板中包含 frontmatter 或其他信息,而这些信息在你应用模板时不想被插入,这会很有用。
例如,以下模板:
--- type: template --- This is a person template.<%* tR = "" -%> --- type: person --- # <% tp.file.cursor() %>
将输出:
--- type: person --- #
建议与提示
需要注意的是, tp.system.prompt() 和 tp.system.suggester() 都需要一个 await 语句来将值保存到变量中。
这里有一些使用 JavaScript 执行命令可以完成的事情的例子:
<%* if (tp.file.title.startsWith("Hello")) { %> This is a hello file ! <%* } else { %> This is a normal file ! <%* } %><%* if (tp.frontmatter.type === "seedling") { %> This is a seedling file ! <%* } else { %> This is a normal file ! <%* } %><%* if (tp.file.tags.contains("#todo")) { %> This is a todo file ! <%* } else { %> This is a finished file ! <%* } %><%* function log(msg) { console.log(msg); } %> <%* log("Title: " + tp.file.title) %><%* tR += tp.file.content.replace(/stuff/, "things"); %>
空白控制
默认情况下,Templater 中的命令不会删除任何换行符。命令会被替换为其值,仅此而已。
有时在插入命令后进行一些空白控制会很有用,这正是这个命令工具提供的功能。
让我们举个例子。以下模板:
<%* if (tp.file.title == "MyFile" ) { %> This is my file! <%* } else { %> This isn't my file! <%* } %> Some content ...
如果条件为假(为真时情况相同),将产生以下输出(注意空行):
This isn't my file!Some content ...
您可能想要删除执行命令产生的空行,这些命令不会产生任何输出。
存在特定的空白控制语法:
标签开头使用 _ 下划线( <%_ )将会删除命令前的所有空白
标签末尾的 _ 下划线(_%>)将删除命令后的所有空白字符
标签开头的 - 短横线(<%-)将删除命令前的换行符
标签末尾的 - 短横线(-%>)将删除命令后的换行符。
在我们的示例中,为了修复模板以删除空白行,我们会使用以下模板(注意标签末尾的 - 短横线),以删除执行命令后的空白换行符:
<%* if (tp.file.title == "MyFile" ) { -%> This is my file! <%* } else { -%> This isn't my file! <%* } -%> Some content ...
哪个将产生以下输出:This isn't my file! Some content ...